Kong Mesh is a platform designed to simplify service mesh management, enabling secure and efficient communication between microservices. It provides features such as security, observability, and traffic control, and uses a sidecar architecture to proxy communication between services. Supporting both Kubernetes and VMs, it enables unified network management across different environments. This allows developers to focus on their applications and reduces operational complexity.
This article is a memo on how to deploy Kong Mesh and use its policies.
Preparing the K8s Environment#
Any standard k8s environment will work, but here I use k3s.
1
2
| export INSTALL_K3S_EXEC="--tls-san <ip address> --write-kubeconfig ~/.kube/config --write-kubeconfig-mode 644"
curl -sfL https://get.k3s.io | sh -
|
If you add something like INSTALL_K3S_CHANNEL=v1.24.4+k3s1 before sh, you can specify the version to install. If omitted, the latest version will be installed.
1
2
3
| kubectl get node
NAME STATUS ROLES AGE VERSION
wenhan-demo Ready control-plane,master 5m56s v1.30.4+k3s1
|
Deploying Kong Mesh#
This time, we’ll deploy a simple Single Zone setup.
Kumactl#
kumactl is a CLI tool for managing Kong Mesh and Kuma, making it easy to configure and operate service meshes. With CLI commands, you can deploy meshes, set policies, and monitor resources.
Follow these steps to install kumactl and add it to your PATH.
If you omit the VERSION, the latest version will be installed.
1
2
3
4
| curl -L https://docs.konghq.com/mesh/installer.sh | VERSION=2.8.2 sh -
cd kong-mesh-2.8.2/bin
export PATH=$(pwd):$PATH
|
Kong Mesh Control Plane#
Deploy the Kong Mesh Control Plane on k8s with the following command. This is the first time we use kumactl. It generates the necessary CRDs for installation.
Set the path to your license file (the same as Kong Gateway) with --license-path.
1
2
| kumactl install control-plane \
--license-path=/home/ubuntu/license | kubectl apply -f -
|
After deployment, the kong-mesh-control-plane-xxxxx Pod will be in Running state, and the default mesh will be deployed.
1
2
3
4
5
6
7
| kubectl get pods -n kong-mesh-system
NAME READY STATUS RESTARTS AGE
kong-mesh-control-plane-5d5cb5f55c-h59wb 1/1 Running 0 24s
kubectl get meshes
NAME AGE
default 2m20s
|
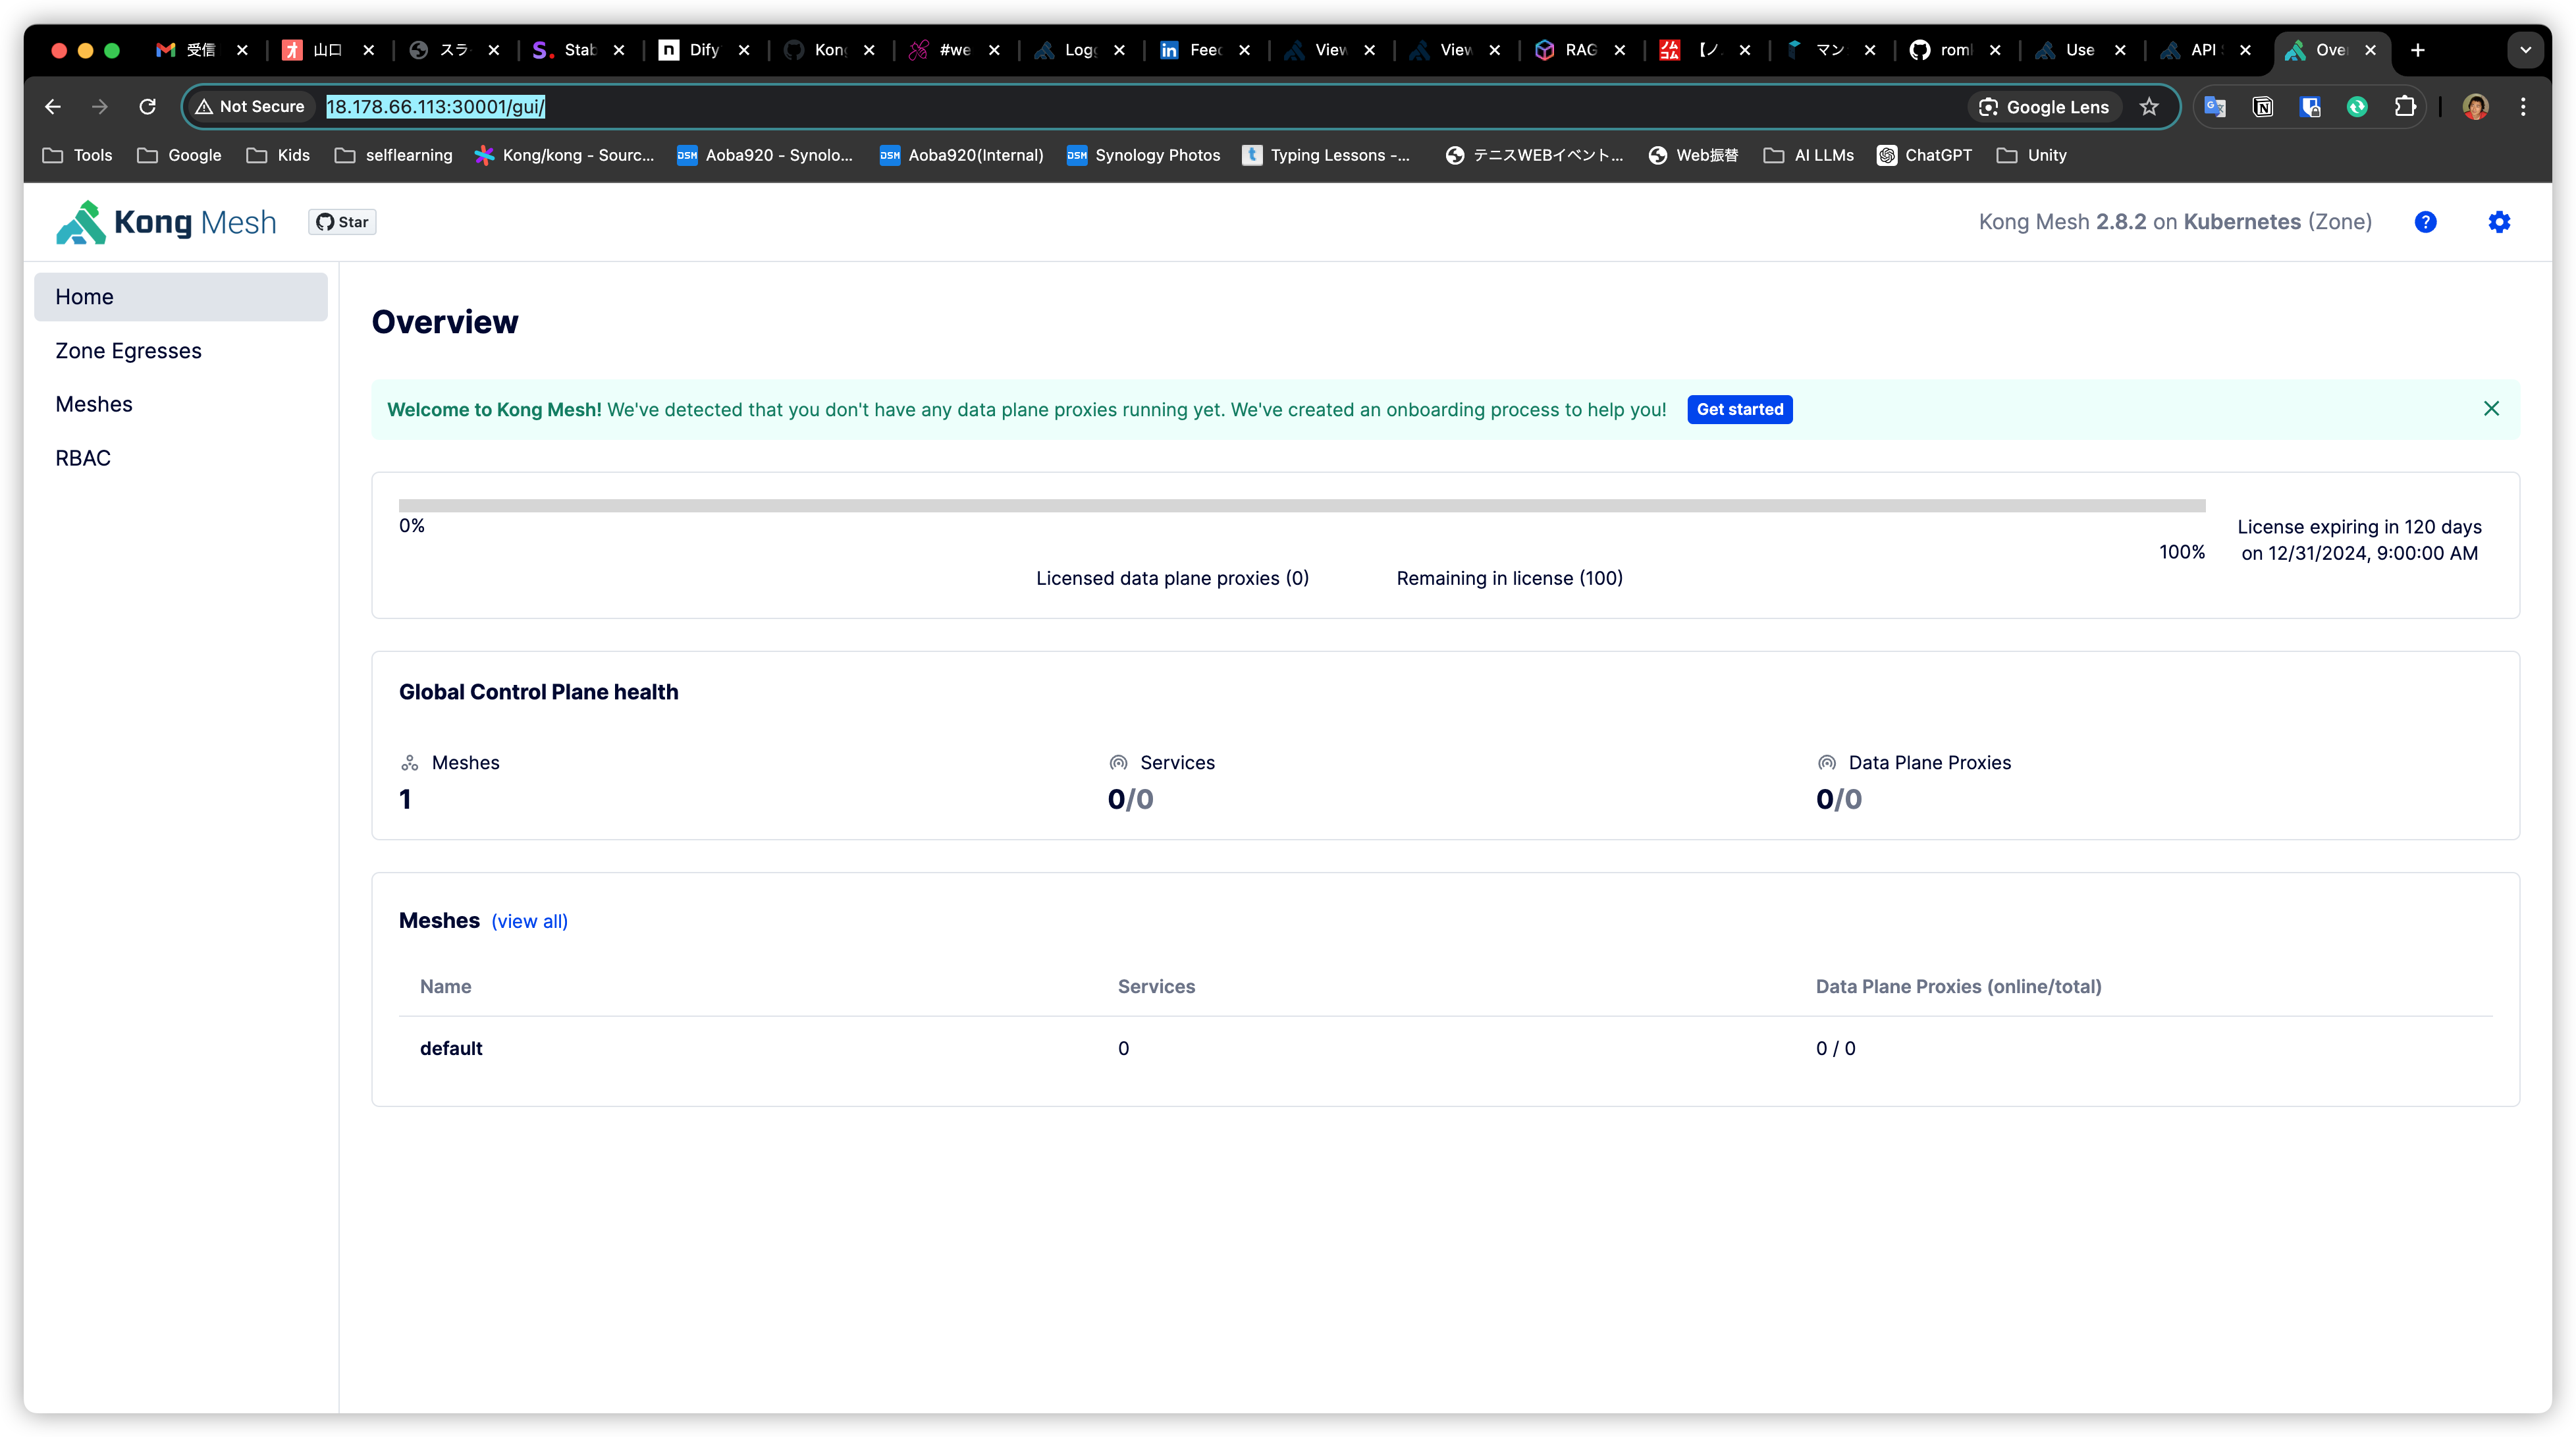
You can access the Kong Mesh Control Plane via CLI or GUI.
First, expose the kong-mesh-control-plane service. Any method is fine, but here we use NodePort for simplicity.
 1
 2
 3
 4
 5
 6
 7
 8
 9
10
11
12
13
14
| kubectl expose deployment kong-mesh-control-plane \
-n kong-mesh-system \
--type=NodePort \
--name=kongmesh-cp \
--port 5681
service/kongmesh-cp exposed
kubectl patch service kongmesh-cp \
--namespace=kong-mesh-system \
--type='json' \
--patch='[{"op": "replace", "path": "/spec/ports/0/nodePort", "value":30001}]'
service/kongmesh-cp patched
|
Accessing the Service#
Accessing the exposed service will return output like the following:
 1
 2
 3
 4
 5
 6
 7
 8
 9
10
11
| curl -sX GET http://<IP address>:30001 | jq
{
"hostname": "kong-mesh-control-plane-5d5cb5f55c-h59wb",
"tagline": "Kong Mesh",
"product": "Kong Mesh",
"version": "2.8.2",
"instanceId": "kong-mesh-control-plane-5d5cb5f55c-h59wb-2875",
"clusterId": "ed1a75f5-caf5-4749-943b-0ad7c6c7a49d",
"gui": "/gui",
"basedOnKuma": "2.8.2"
}
|
Accessing the GUI#
Add /gui to the exposed service URL to access the GUI interface.
Accessing from kumactl#
You can also check the Kong Mesh Control Plane from the kumactl command.
First, add the Control Plane information to kumactl.
1
2
3
4
5
| kumactl config control-planes add \
--name=kongmesh-cp \
--address=http://18.178.66.113:30001 --overwrite
added Control Plane "kongmesh-cp"
switched active Control Plane to "kongmesh-cp"
|
You can check the current mesh settings with kumactl get meshes.
1
2
3
| kumactl get meshes
NAME mTLS METRICS LOGGING TRACING LOCALITY ZONEEGRESS AGE
default off off off off off off 9h
|
Adding an App to Kong Mesh#
Add the label kuma.io/sidecar-injection: enabled to the resource’s metadata.labels to add it to Kong Mesh. In the example below, the label is added to the Namespace, so all Pods in this Namespace will have a sidecar (DP) added and be managed by Kong Mesh.
Deploying the App#
Save the following demo YAML file. The Front End service displays the page, and the Redis service stores the counter—a simple app.

  1
  2
  3
  4
  5
  6
  7
  8
  9
 10
 11
 12
 13
 14
 15
 16
 17
 18
 19
 20
 21
 22
 23
 24
 25
 26
 27
 28
 29
 30
 31
 32
 33
 34
 35
 36
 37
 38
 39
 40
 41
 42
 43
 44
 45
 46
 47
 48
 49
 50
 51
 52
 53
 54
 55
 56
 57
 58
 59
 60
 61
 62
 63
 64
 65
 66
 67
 68
 69
 70
 71
 72
 73
 74
 75
 76
 77
 78
 79
 80
 81
 82
 83
 84
 85
 86
 87
 88
 89
 90
 91
 92
 93
 94
 95
 96
 97
 98
 99
100
101
102
103
104
105
106
107
108
109
110
111
112
113
114
115
116
117
118
119
120
121
122
123
| apiVersion: v1
kind: Namespace
metadata:
name: kuma-demo
labels:
kuma.io/sidecar-injection: enabled
---
apiVersion: apps/v1
kind: Deployment
metadata:
name: redis
namespace: kuma-demo
spec:
selector:
matchLabels:
app: redis
replicas: 1
template:
metadata:
labels:
app: redis
spec:
containers:
- name: redis
image: "redis"
ports:
- name: tcp
containerPort: 6379
lifecycle:
postStart:
exec:
command: ["/usr/local/bin/redis-cli", "set", "zone", "local"]
---
apiVersion: v1
kind: Service
metadata:
name: redis
namespace: kuma-demo
spec:
selector:
app: redis
ports:
- protocol: TCP
port: 6379
---
apiVersion: apps/v1
kind: Deployment
metadata:
name: demo-app
namespace: kuma-demo
spec:
selector:
matchLabels:
app: demo-app
replicas: 1
template:
metadata:
labels:
app: demo-app
version: v1
spec:
containers:
- name: demo-app
image: "thefosk/kuma-demo"
env:
- name: REDIS_HOST
value: "redis.kuma-demo.svc.cluster.local"
- name: REDIS_PORT
value: "6379"
- name: APP_VERSION
value: "1.0"
- name: APP_COLOR
value: "#efefef"
ports:
- name: http
containerPort: 5000
---
apiVersion: apps/v1
kind: Deployment
metadata:
name: demo-app-v2
namespace: kuma-demo
spec:
selector:
matchLabels:
app: demo-app
replicas: 1
template:
metadata:
labels:
app: demo-app
version: v2
spec:
containers:
- name: demo-app
image: "thefosk/kuma-demo"
env:
- name: REDIS_HOST
value: "redis.kuma-demo.svc.cluster.local"
- name: REDIS_PORT
value: "6379"
- name: APP_VERSION
value: "2.0"
- name: APP_COLOR
value: "#5da36f"
ports:
- name: http
containerPort: 5000
---
apiVersion: v1
kind: Service
metadata:
name: demo-app
namespace: kuma-demo
annotations:
5000.service.kuma.io/protocol: http
ingress.kubernetes.io/service-upstream: "true"
spec:
selector:
app: demo-app
ports:
- protocol: TCP
port: 5000
|
Use the saved YAML file to add the demo resources.
 1
 2
 3
 4
 5
 6
 7
 8
 9
10
11
12
13
| kubectl apply -f counterapp.yaml
namespace/kuma-demo created
deployment.apps/redis created
service/redis created
deployment.apps/demo-app created
deployment.apps/demo-app-v2 created
service/demo-app created
kubectl get pod -n kuma-demo
NAME READY STATUS RESTARTS AGE
demo-app-5db8dc7c7c-5lxv4 2/2 Running 0 31s
demo-app-v2-977f89977-szv4p 2/2 Running 0 31s
redis-b95455698-hk7sm 2/2 Running 0 31s
|
You can see that each Pod has two containers, indicating that the Sidecar has been added.
You can also check this in the GUI under Data Plane Proxies.
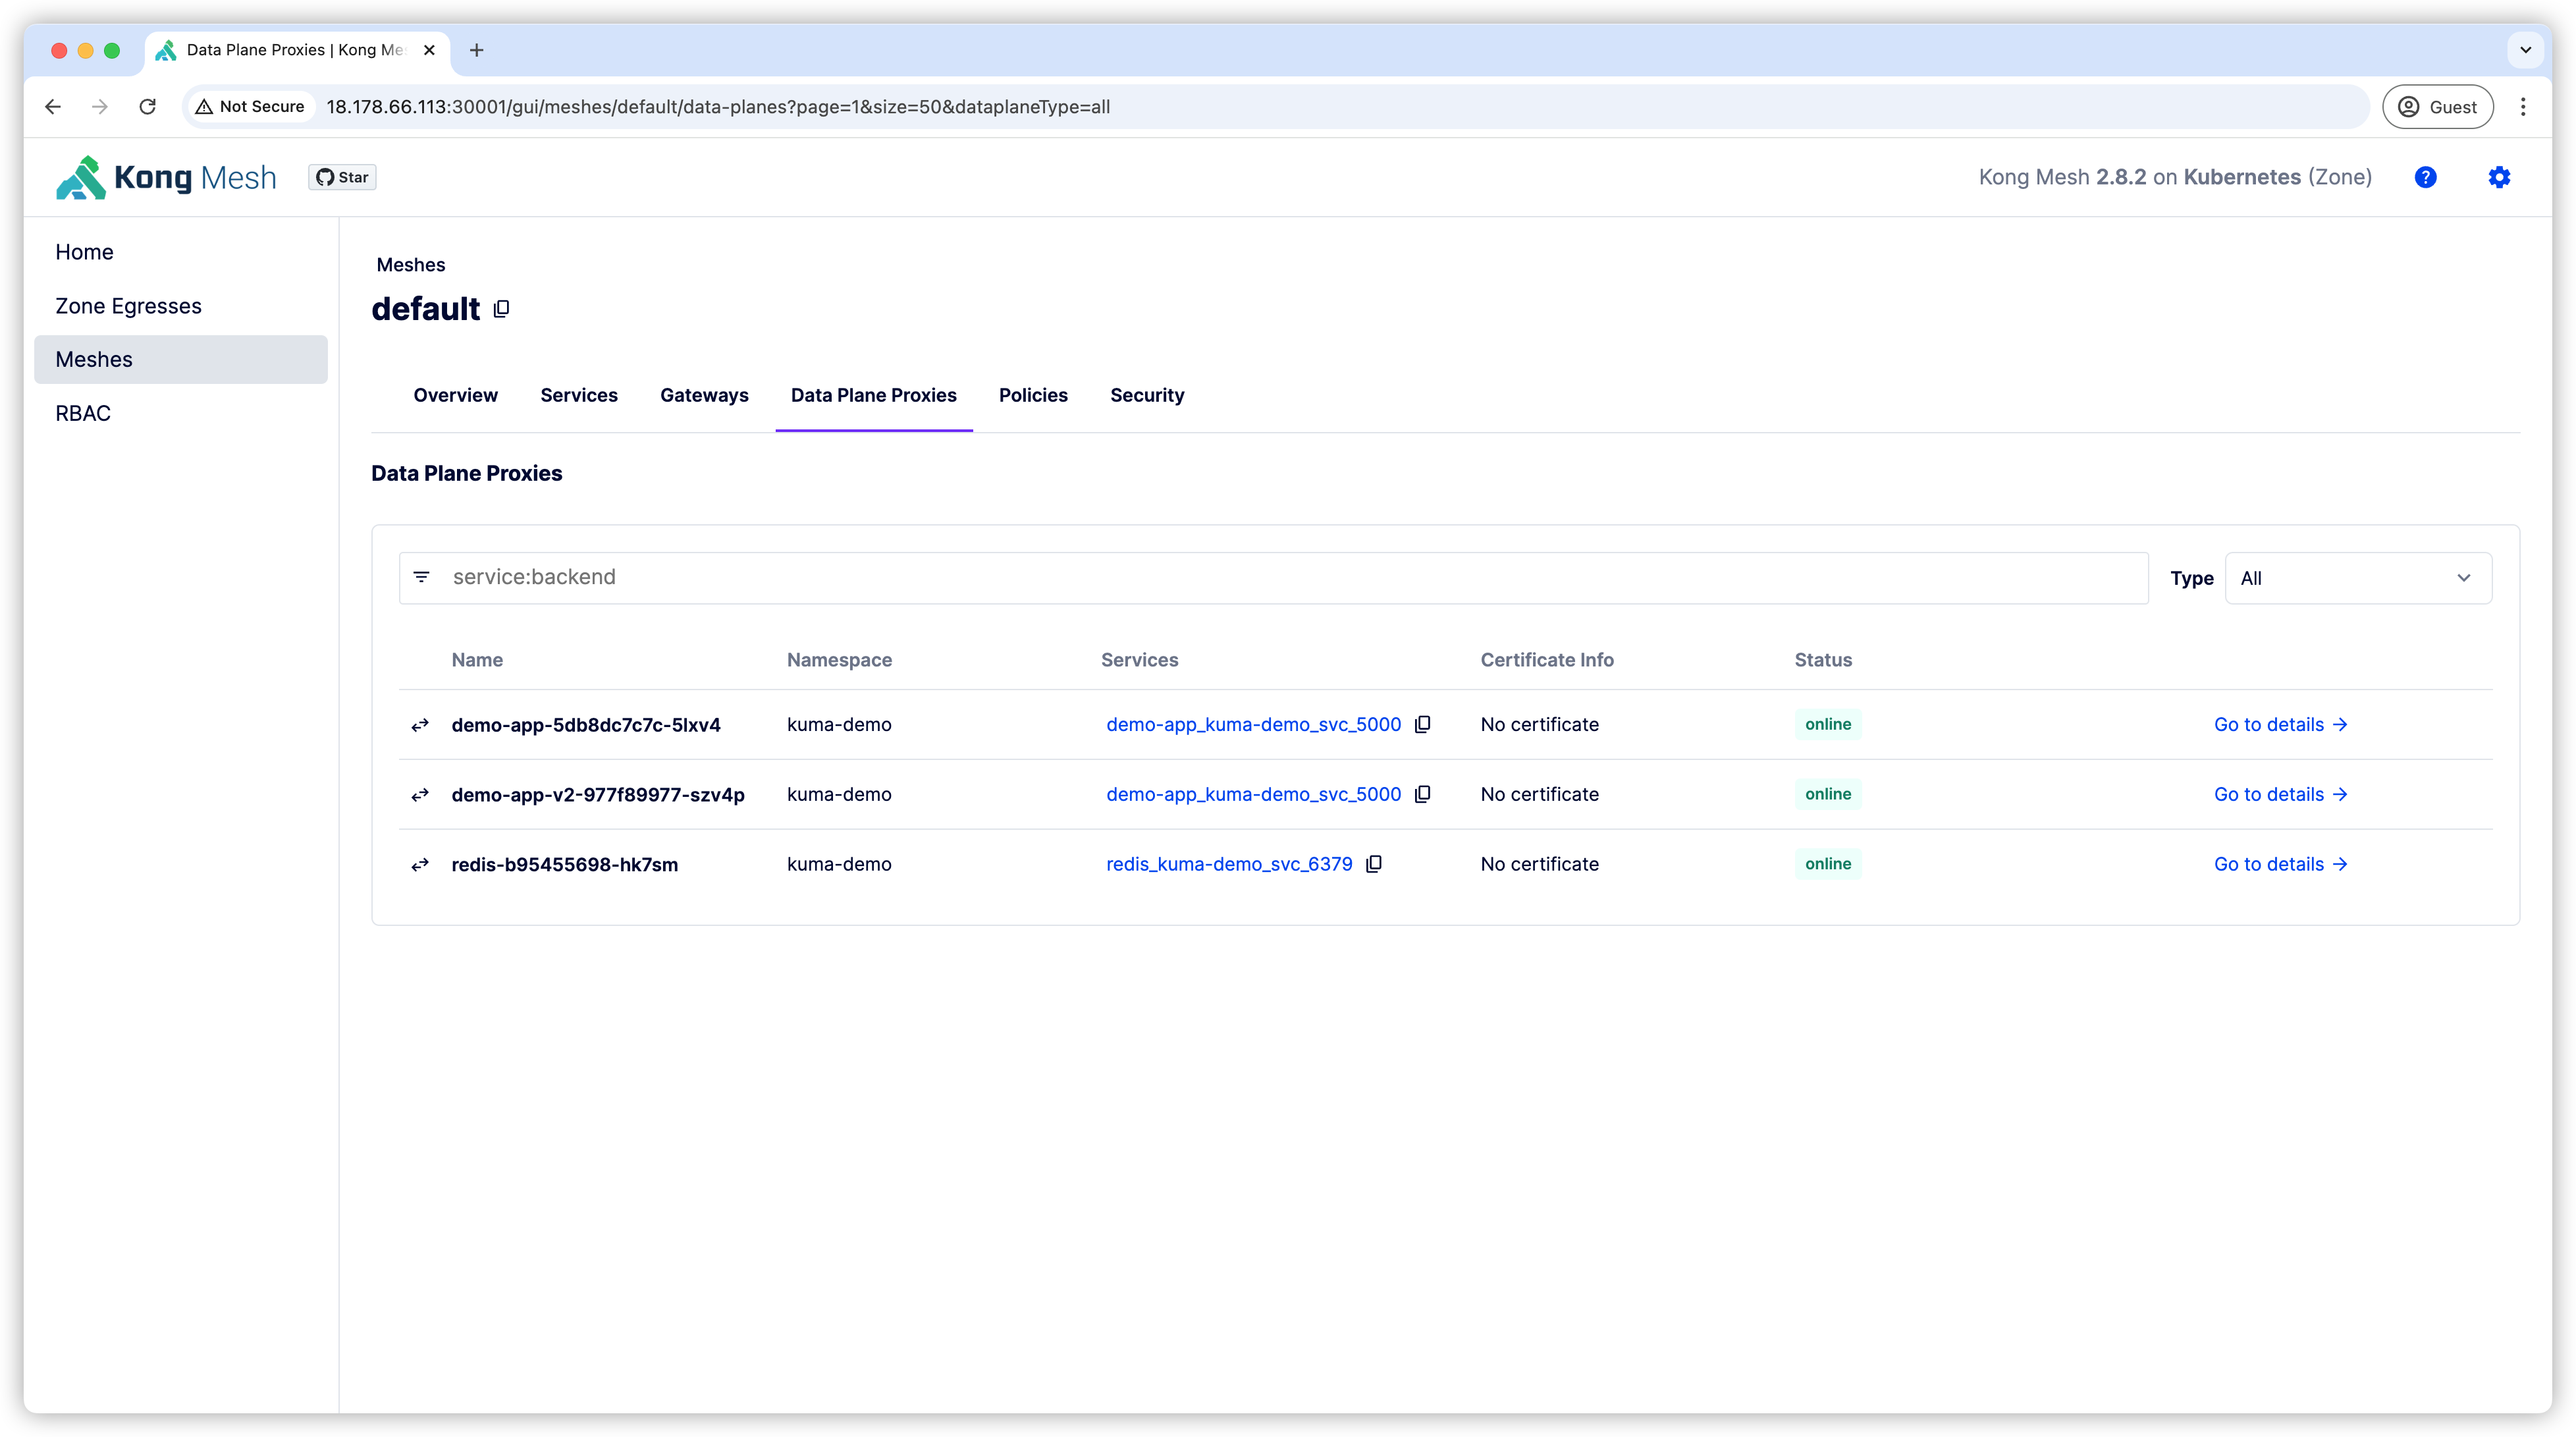
You can also check the currently managed Sidecars (dataplanes) with the kumactl command.
1
2
3
4
5
| kumactl inspect dataplanes
MESH NAME TAGS STATUS LAST CONNECTED AGO LAST UPDATED AGO TOTAL UPDATES TOTAL ERRORS CERT REGENERATED AGO CERT EXPIRATION CERT REGENERATIONS CERT BACKEND SUPPORTED CERT BACKENDS KUMA-DP VERSION ENVOY VERSION DEPENDENCIES VERSIONS NOTES
default demo-app-5db8dc7c7c-5lxv4.kuma-demo app=demo-app k8s.kuma.io/namespace=kuma-demo k8s.kuma.io/service-name=demo-app k8s.kuma.io/service-port=5000 kubernetes.io/hostname=wenhan-demo kuma.io/protocol=http kuma.io/service=demo-app_kuma-demo_svc_5000 kuma.io/zone=default pod-template-hash=5db8dc7c7c version=v1 Online 1m 51s 9 0 never - 0 - 2.8.2 1.30.4 -
default demo-app-v2-977f89977-szv4p.kuma-demo app=demo-app k8s.kuma.io/namespace=kuma-demo k8s.kuma.io/service-name=demo-app k8s.kuma.io/service-port=5000 kubernetes.io/hostname=wenhan-demo kuma.io/protocol=http kuma.io/service=demo-app_kuma-demo_svc_5000 kuma.io/zone=default pod-template-hash=977f89977 version=v2 Online 1m 51s 9 0 never - 0 - 2.8.2 1.30.4 -
default redis-b95455698-hk7sm.kuma-demo app=redis k8s.kuma.io/namespace=kuma-demo k8s.kuma.io/service-name=redis k8s.kuma.io/service-port=6379 kubernetes.io/hostname=wenhan-demo kuma.io/protocol=tcp kuma.io/service=redis_kuma-demo_svc_6379 kuma.io/zone=default pod-template-hash=b95455698 Online 1m 50s 9 0 never - 0 - 2.8.2 1.30.4 -
|
Publishing the App#
Let’s try accessing the app. There are several ways, but here we’ll use the Gateway + Ingress method.
Install gateway#
 1
 2
 3
 4
 5
 6
 7
 8
 9
10
11
12
13
14
15
16
17
18
19
20
21
22
23
24
25
26
27
28
29
30
31
32
| kubectl apply -f https://github.com/kubernetes-sigs/gateway-api/releases/download/v1.0.0/standard-install.yaml
customresourcedefinition.apiextensions.k8s.io/gatewayclasses.gateway.networking.k8s.io created
customresourcedefinition.apiextensions.k8s.io/gateways.gateway.networking.k8s.io created
customresourcedefinition.apiextensions.k8s.io/httproutes.gateway.networking.k8s.io created
customresourcedefinition.apiextensions.k8s.io/referencegrants.gateway.networking.k8s.io created
echo "
---
apiVersion: gateway.networking.k8s.io/v1
kind: GatewayClass
metadata:
name: kong
annotations:
konghq.com/gatewayclass-unmanaged: 'true'
spec:
controllerName: konghq.com/kic-gateway-controller
---
apiVersion: gateway.networking.k8s.io/v1
kind: Gateway
metadata:
name: kong
spec:
gatewayClassName: kong
listeners:
- name: proxy
port: 80
protocol: HTTP
" | kubectl apply -f -
gatewayclass.gateway.networking.k8s.io/kong created
gateway.gateway.networking.k8s.io/kong created
|
Install Kong KIC and Ingress#
 1
 2
 3
 4
 5
 6
 7
 8
 9
10
11
12
13
14
15
16
17
18
19
20
21
22
23
24
25
26
27
28
29
30
31
32
| kubectl create ns kong
kubectl label ns kong kuma.io/sidecar-injection='enabled'
helm install kong kong/ingress -n kong
WARNING: Kubernetes configuration file is group-readable. This is insecure. Location: /home/ubuntu/.kube/config
WARNING: Kubernetes configuration file is world-readable. This is insecure. Location: /home/ubuntu/.kube/config
NAME: kong
LAST DEPLOYED: Mon Sep 2 10:02:13 2024
NAMESPACE: kong
STATUS: deployed
REVISION: 1
TEST SUITE: None
cat <<EOF | kubectl apply -f -
apiVersion: networking.k8s.io/v1
kind: Ingress
metadata:
name: counterapp
namespace: kuma-demo
annotations:
kubernetes.io/ingress.class: kong
spec:
rules:
- http:
paths:
- path: /
pathType: Prefix
backend:
service:
name: demo-app
port:
number: 5000
EOF
|
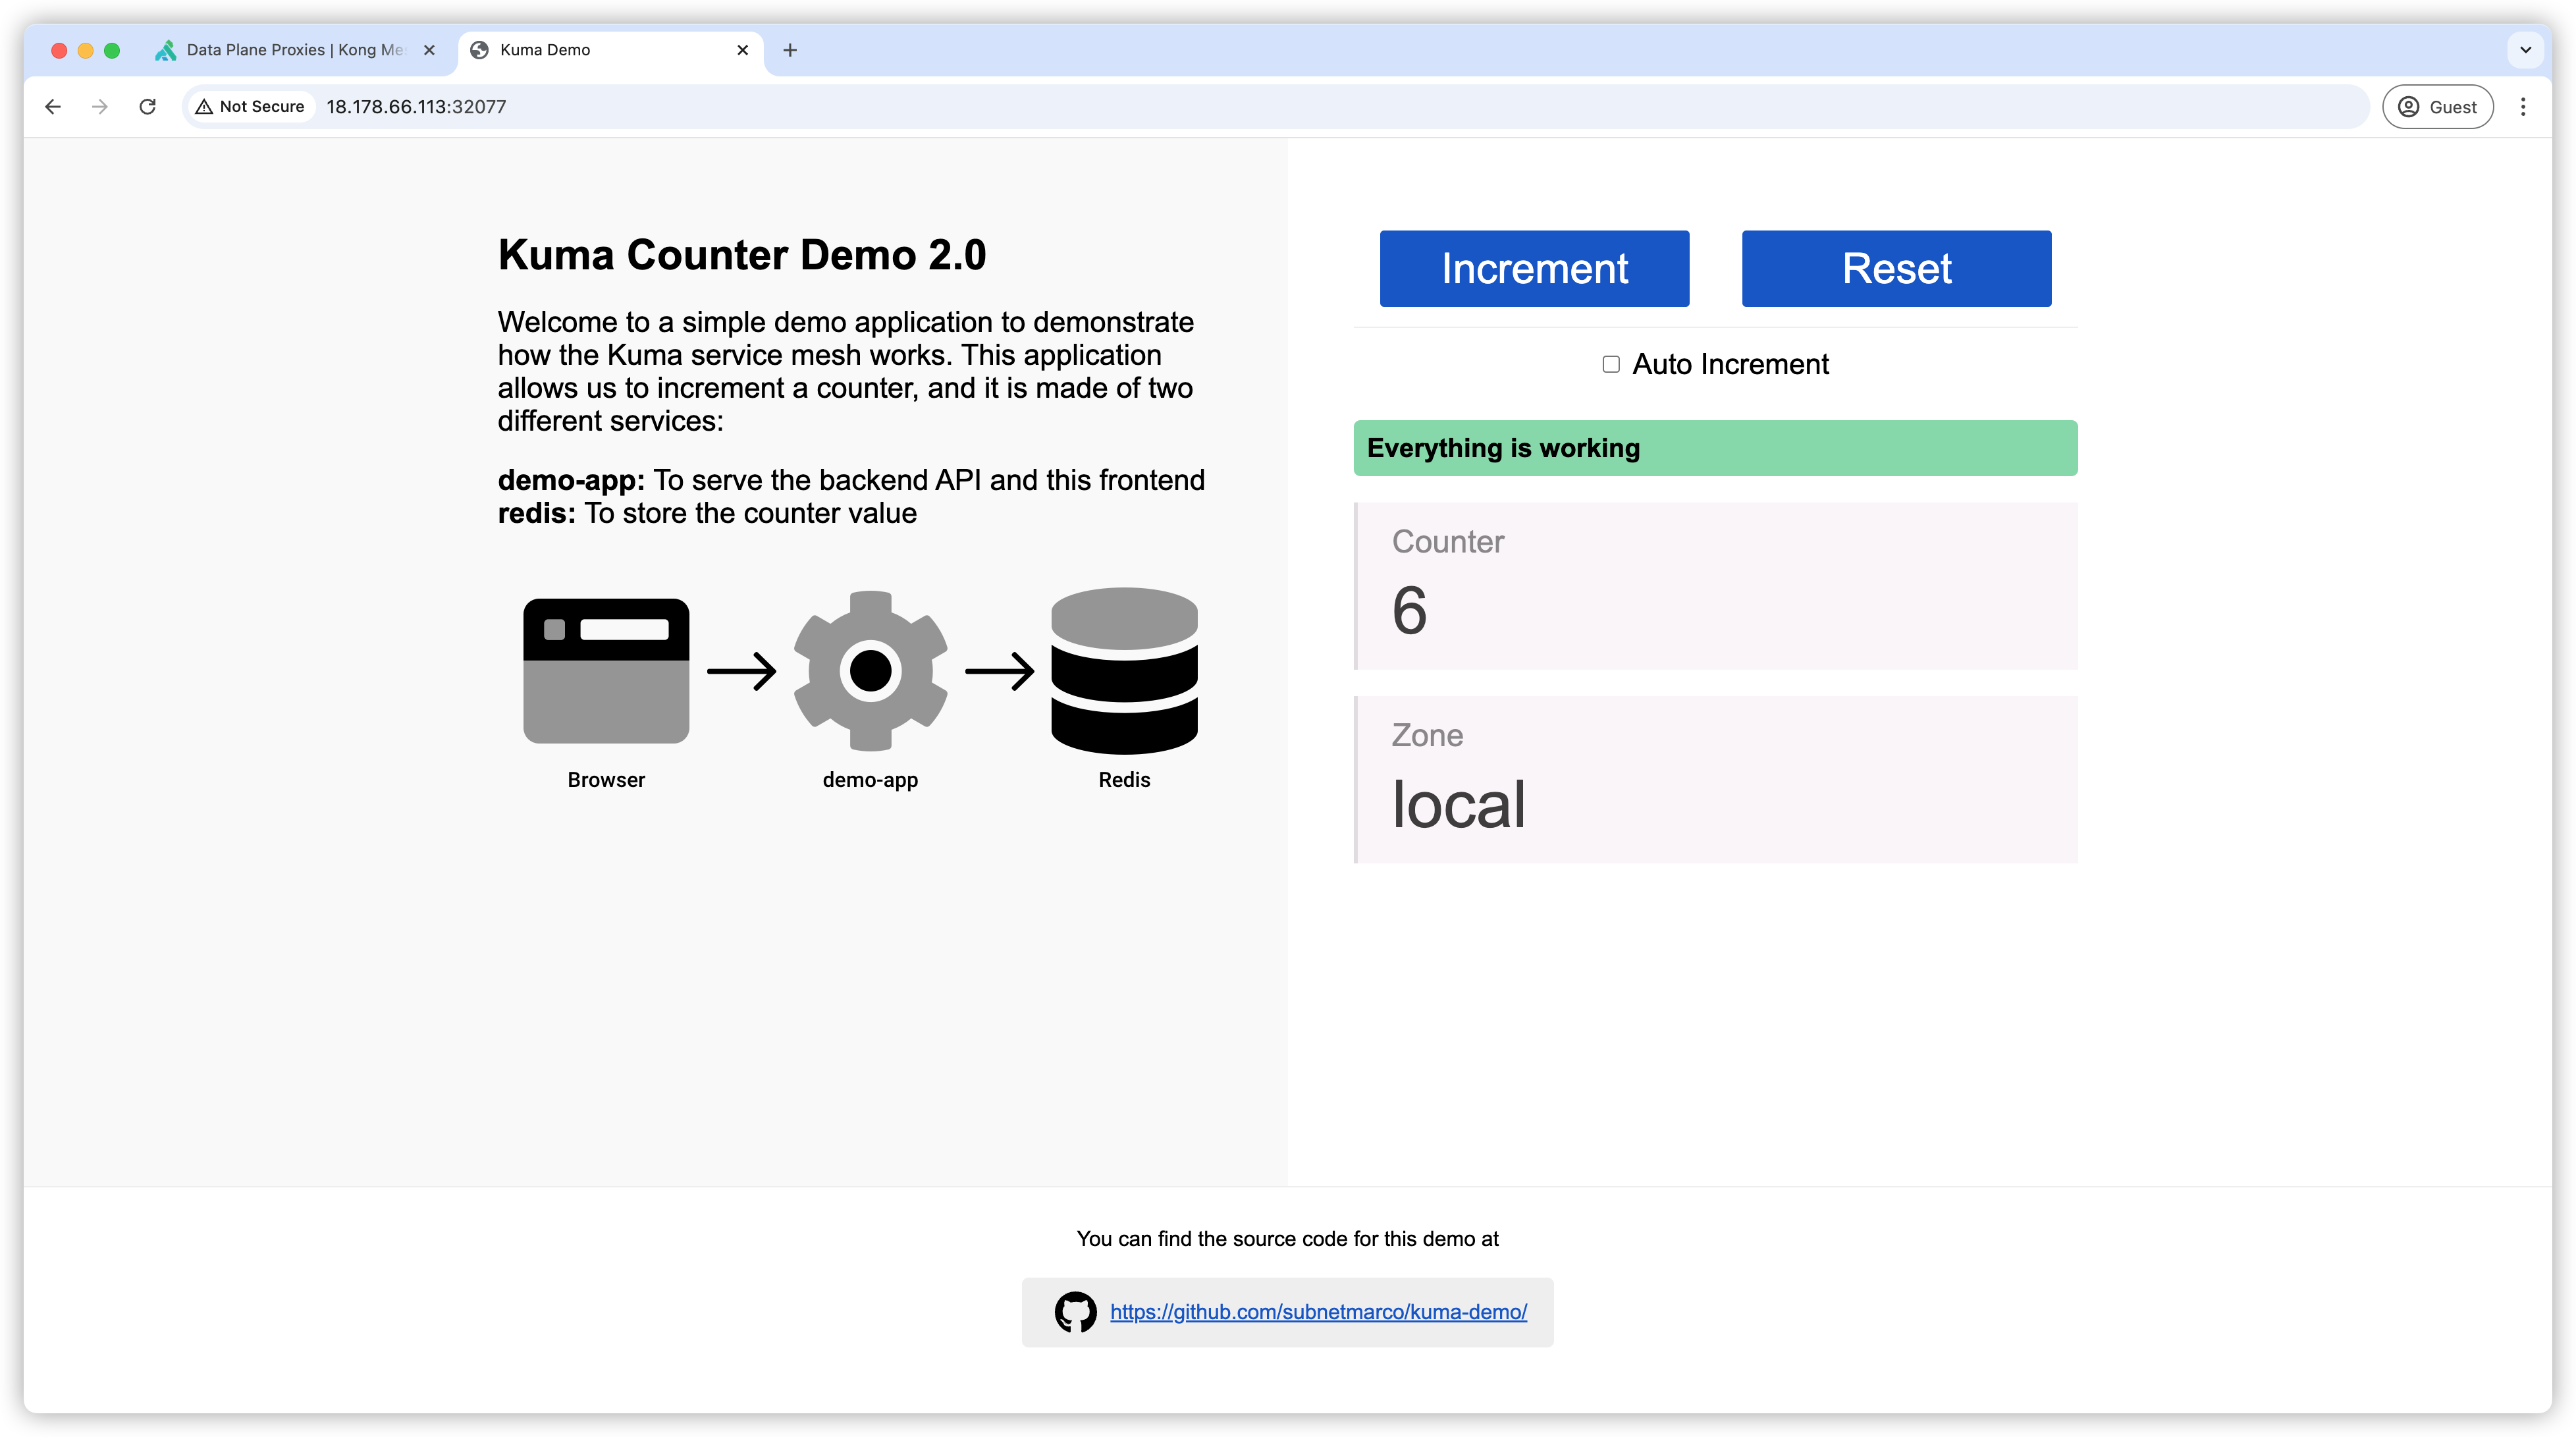
Now you can access the deployed APP via the Kong-gateway-proxy.
1
2
3
4
5
6
| kubectl get svc -n kong
NAME TYPE CLUSTER-IP EXTERNAL-IP PORT(S) AGE
kong-controller-validation-webhook ClusterIP 10.43.225.243 <none> 443/TCP 3m10s
kong-gateway-admin ClusterIP None <none> 8444/TCP 3m10s
kong-gateway-manager NodePort 10.43.69.48 <none> 8002:32047/TCP,8445:31615/TCP 3m10s
kong-gateway-proxy LoadBalancer 10.43.97.252 <pending> 80:32333/TCP,443:31081/TCP 3m10s
|
Access the app via port 32333.
Click Increment, and everything should work fine.
Leveraging Kong Mesh Policies#
This is where Kong Mesh really shines. Kong Mesh policies support setting rules for security, access control, and traffic management in a service mesh environment. The main elements of these policies are:
- Security Policy: Enhances security between microservices through encryption (mTLS), authentication, and authorization. Ensures traffic is securely transmitted.
- Traffic Policy: Defines communication rules between services. Manages retries, timeouts, traffic shaping, load balancing, etc.
- Authorization Policy: Controls which services or users can access which resources based on RBAC (Role-Based Access Control).
- Audit Policy: Records system-wide activities and generates audit logs, enabling early detection of anomalies or security incidents.
Kong Mesh policies aim to improve the security, performance, and reliability of distributed systems through these features.
https://docs.konghq.com/mesh/latest/policies/introduction/
Here, we’ll explain how to build a Zero Trust network by applying the following two policies:
https://docs.konghq.com/mesh/latest/policies/meshpassthrough/
https://docs.konghq.com/mesh/latest/policies/meshtrafficpermission/
Building a Zero-trust Network#
Enabling mTLS#
By default, mTLS is disabled.
1
2
3
| kumactl get meshes
NAME mTLS METRICS LOGGING TRACING LOCALITY ZONEEGRESS AGE
default off off off off off off 9h
|
Kong Mesh has a built-in CA, so you can enable it easily as follows:
 1
 2
 3
 4
 5
 6
 7
 8
 9
10
11
12
13
14
15
16
17
| # config mesh to enable mtls
cat <<EOF | kubectl apply -f -
apiVersion: kuma.io/v1alpha1
kind: Mesh
metadata:
name: default
spec:
mtls:
enabledBackend: ca-1
backends:
- name: ca-1
type: builtin
EOF
kumactl get meshes
NAME mTLS METRICS LOGGING TRACING LOCALITY ZONEEGRESS AGE
default builtin/ca-1 off off off off off 9h
|
Once mTLS is enabled, all traffic requires meshtrafficpermission. Since we haven’t created any yet, access to the APP should fail.
Depending on the Kong Mesh version, it may not fail—this is because an allow-all meshtrafficpermission exists by default.
Allowing Access Between Microservices#
For example, creating an allow-all permission will keep all traffic in the mesh working as usual.
 1
 2
 3
 4
 5
 6
 7
 8
 9
10
11
12
13
14
15
16
17
| cat <<EOF | kubectl apply -f -
apiVersion: kuma.io/v1alpha1
kind: MeshTrafficPermission
metadata:
name: allow-all
namespace: kong-mesh-system
labels:
kuma.io/mesh: default
spec:
targetRef:
kind: Mesh
from:
- targetRef:
kind: Mesh
default:
action: Allow
EOF
|
Let’s set permissions at the microservice level for more control.
First, set permission from the Front End Kong Gateway service to the APP.
 1
 2
 3
 4
 5
 6
 7
 8
 9
10
11
12
13
14
15
16
17
18
19
20
21
| cat <<EOF | kubectl apply -f -
apiVersion: kuma.io/v1alpha1
kind: MeshTrafficPermission
metadata:
name: kong2frontend
namespace: kong-mesh-system
labels:
kuma.io/mesh: default
spec:
targetRef:
kind: MeshService
name: demo-app_kuma-demo_svc_5000
from:
- targetRef:
kind: MeshSubset
tags:
kuma.io/service: kong-gateway-admin_kong_svc_8444
default:
action: Allow
EOF
meshtrafficpermission.kuma.io/kong2frontend created
|
Next, set permission from the APP to Redis.
 1
 2
 3
 4
 5
 6
 7
 8
 9
10
11
12
13
14
15
16
17
18
19
20
| cat <<EOF | kubectl apply -f -
apiVersion: kuma.io/v1alpha1
kind: MeshTrafficPermission
metadata:
name: frontend2backend
namespace: kong-mesh-system
labels:
kuma.io/mesh: default
spec:
targetRef:
kind: MeshService
name: redis_kuma-demo_svc_6379
from:
- targetRef:
kind: MeshSubset
tags:
kuma.io/service: demo-app_kuma-demo_svc_5000
default:
action: Allow
EOF
|
With this, microservice-level access permissions are set, and the application should work normally.
Summary#
Kong Mesh is a platform that simplifies service mesh management, enabling secure and efficient communication between microservices. This article explains how to deploy Kong Mesh and use its policies.
- Preparing the K8s Environment: Set up a Kubernetes environment using k3s.
- Deploying Kong Mesh:
- Deploy the Kong Mesh Control Plane using
kumactl. - Expose the Control Plane with
NodePort and access it via CLI or GUI.
- Deploying the Application:
- Add the
kuma.io/sidecar-injection: enabled label to add sidecars to Pods in the Namespace. - Deploy Redis and the demo app, and manage them with Kong Mesh.
- Publishing the Application:
- Use Gateway and Ingress to publish the application.
- Leveraging Kong Mesh Policies:
- Enable mTLS to build a Zero Trust Network.
- Set
MeshTrafficPermission to control access between microservices.
Through this process, you can learn how to build a secure and efficient service mesh using Kong Mesh and manage traffic with policies.